If your store is new to Edelweiss360, defaults and preferences can be set in the Edelweiss360 Setup Wizard.
Settings can also be modified on your 360 homepage and on the Preferences page. You can add or change your logo as shown below:
Your logo will be displayed at the top of each campaign you send.
On the Preferences page, you’ll find various Email Template Settings, your contact information, store address, and hours, title link settings, and more.

Email Template Settings:
Here, you can add default settings to several common email fields, as well as a few that are unique to Edelweiss360.
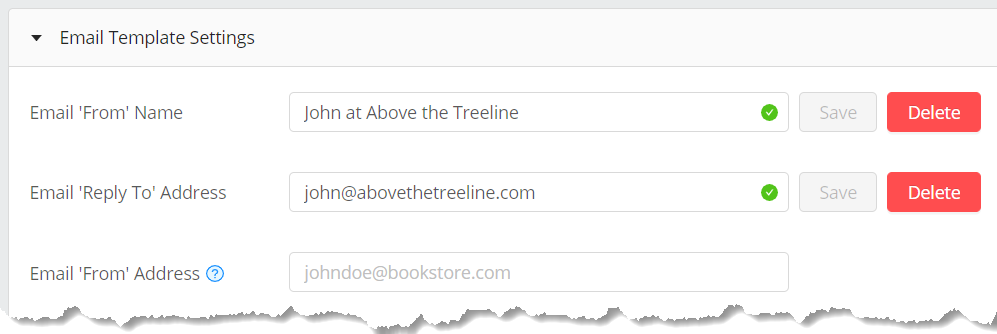
The ‘Reply To’ address can be overridden in any given campaign and the ‘From’ address is only required if you haven’t yet completed Domain Authentication.
The next few fields control the default header text for the various possible sections of a campaign, including the title section, events section, and collection section. You’ll also see the option to change the labels of your Buy and Preorder buttons.
Note that you can also associate a URL with your store logo, which appears at the top of each campaign.
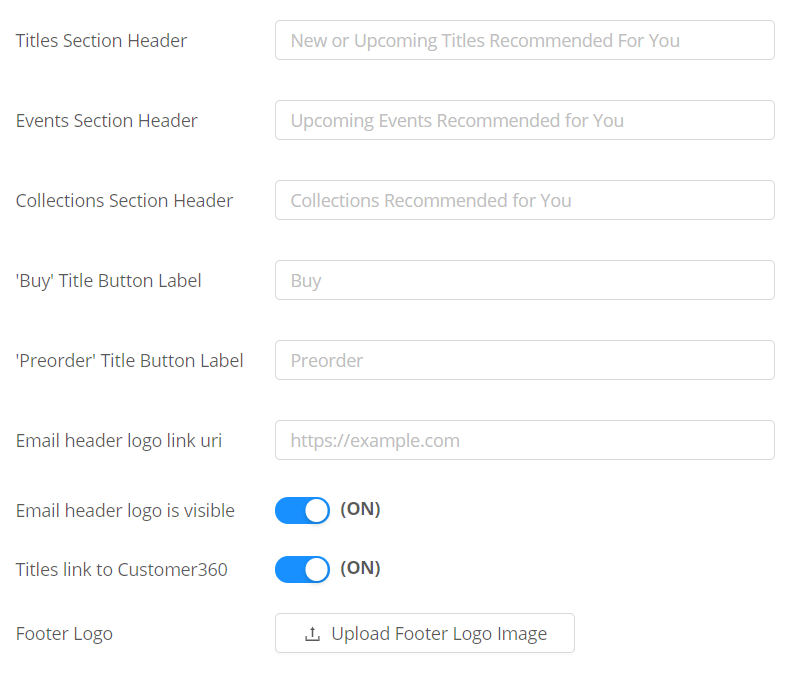
“Titles Link to Customer360” is an option that, if turned on, will result in your Buy and Preorder buttons taking customers to the customer-facing side of 360. This tool isn’t fully developed yet, but may be in the future. Settings for what customers will see there can be set in the next set of options shown below. Note that this is completely optional and if set to ‘off,’ the settings below can be ignored.
Customer App Settings:

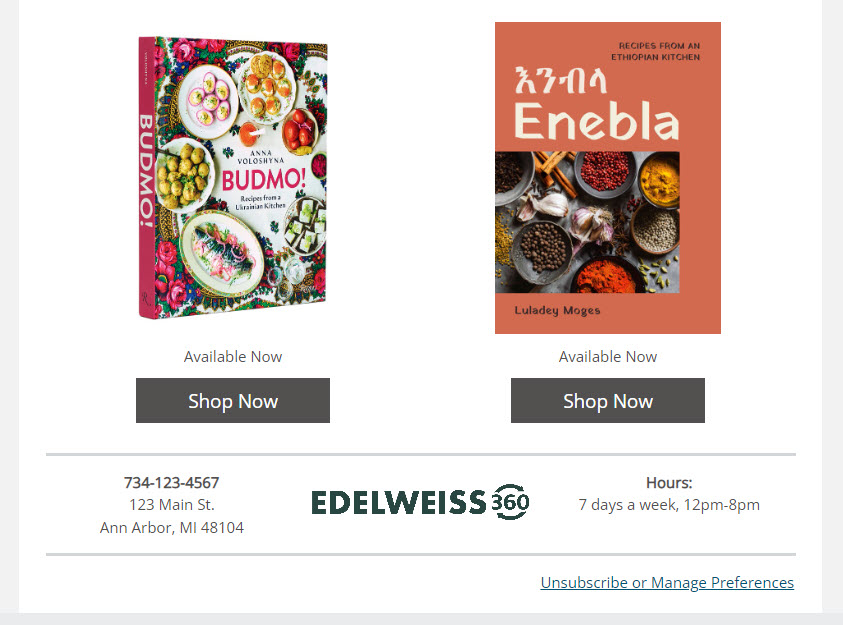
Contact/Address/Hours:
Self-explanatory but incredibly important — it should be easy for your customers to reach you and to know when you’re open!

This information will be added to every outgoing campaign and will be presented like so:
Links:

Initially, we’ll assist you in getting these links set up correctly, but if you’re working on setting them up on your own, use your website as your guide! First, go to your store’s website and click on a title to see how your site’s title URLs are formatted. It will be/should be the same for all of your titles. As seen in the example below, you’ll have a “base URL” to which you simply need to add the appropriate ISBN to get to a specific title’s page:
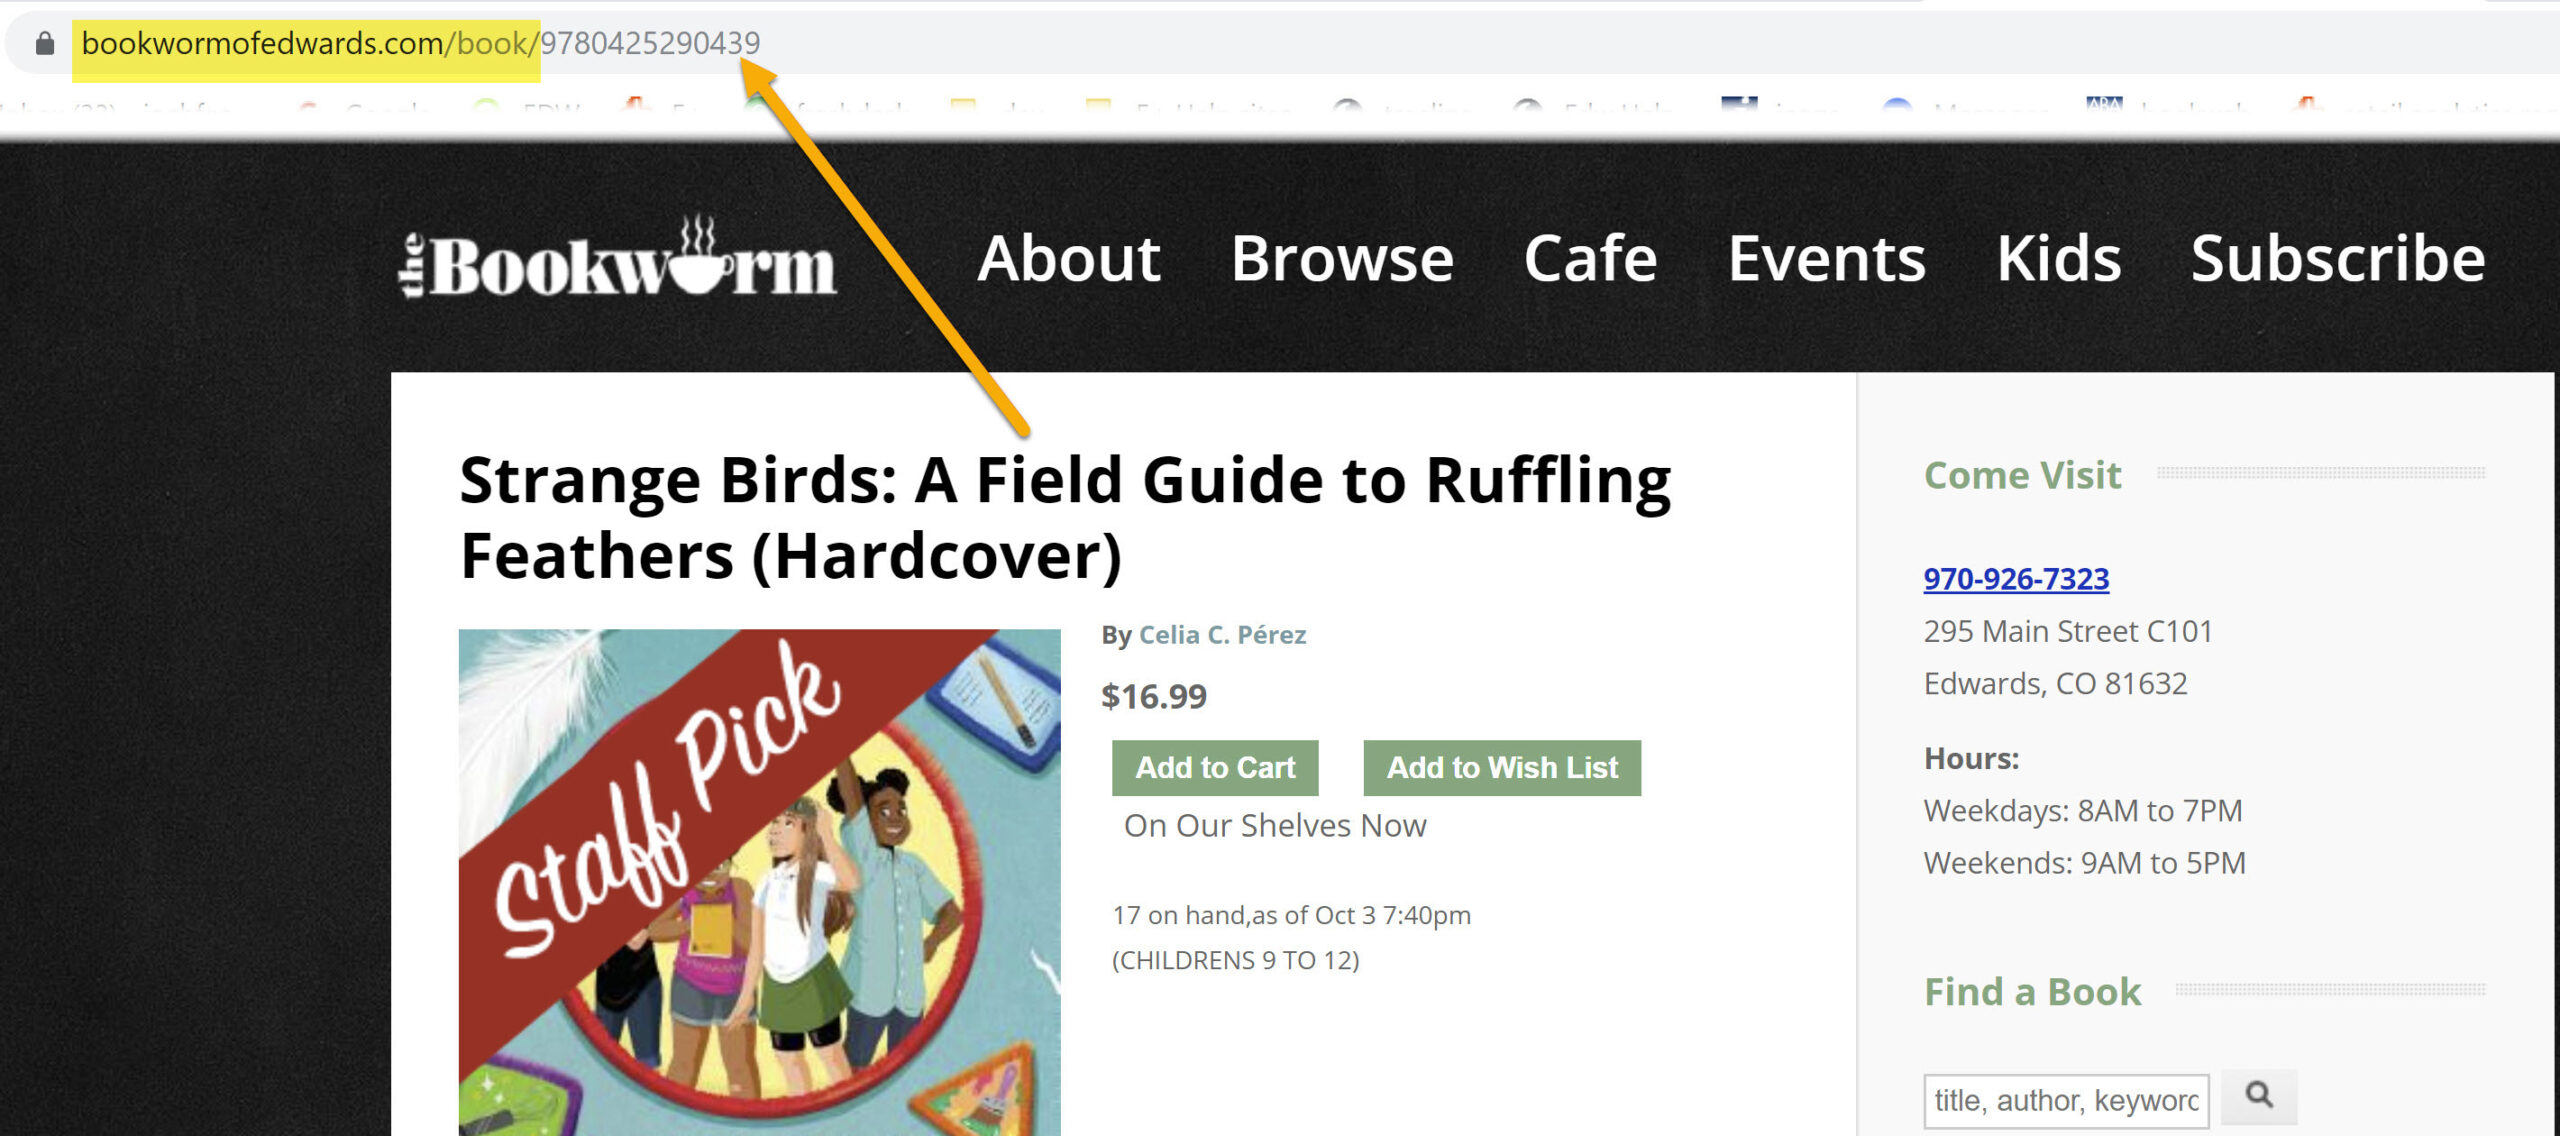
In your 360 title link settings, the addition of {sku} will simply plug in the ISBN to that base URL to link to a specific title. As a result, the Buy buttons in your campaigns will link directly to the appropriate title on your store’s website, making it easy for customers to purchase.
See details here about creating your own title-specific custom URLs, if needed.
Although not currently necessary, you can also add a link to your Contact Us page, your main Browse page, and your Search page.
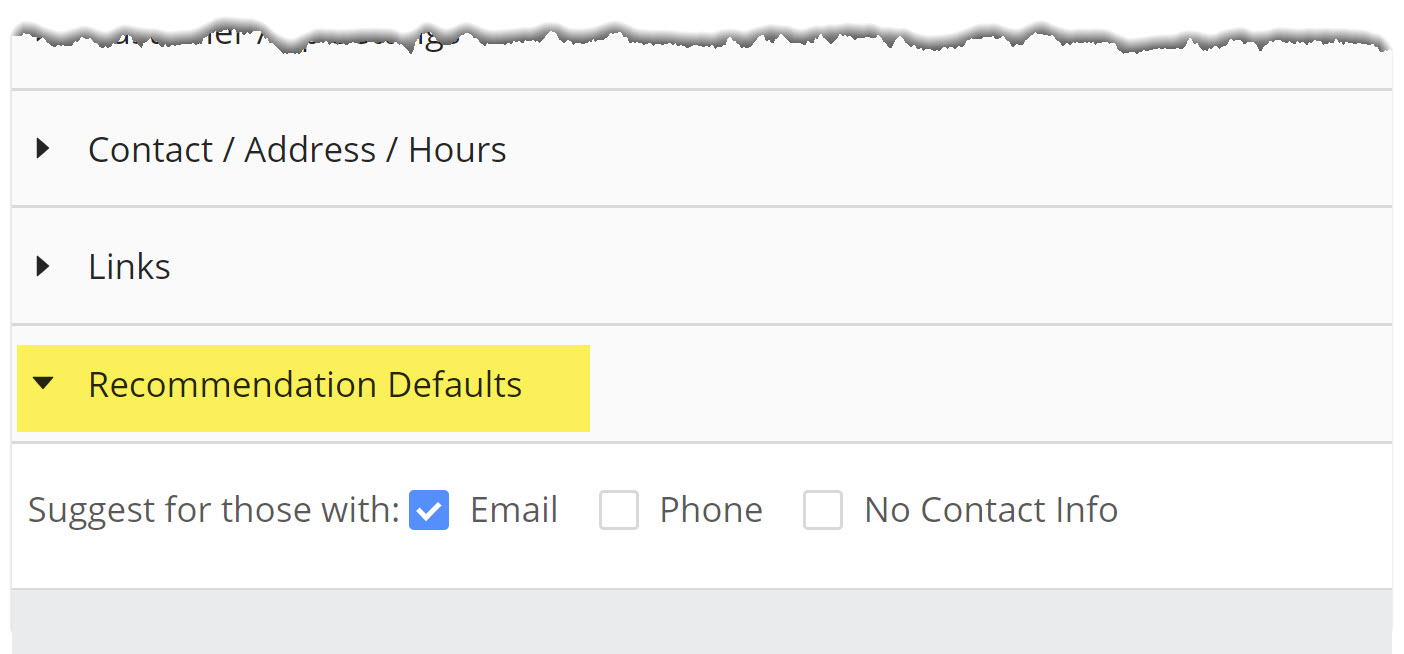
Recommendation Defaults:
Simply make sure the Email selection is checked. The Phone and No Contact Info selections may be used in future development!